


.JPG)
Here are the steps you follow in more detail. Suggest you buy a trashed very cheapo neck somewhere for your first attempt.
You need a few tools that are really must haves for this job. Dont try to improviise here; the result will be uh, disappointing.
Pliers to cut fretwire
Special pliers (really special, must) to remove frets from a fretboard.
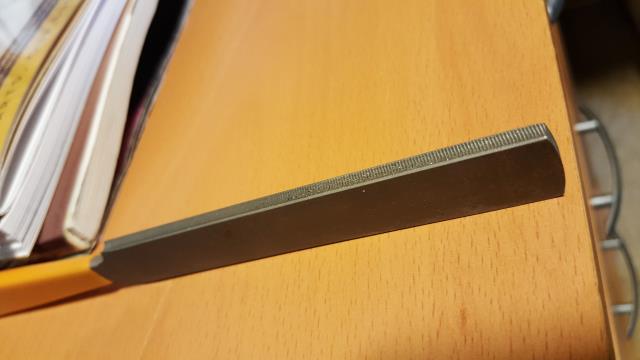
Three sided file, at least 25cm long (pic above)
Crowning file
File to work the edges
Several flat files
Fretpress of sorts
Superglue and construction glue
Saws
polishing stuff
Take the neck off the guitar and make certain you can fix it in a stable position on your workbench or space.
Make certain the neck is straight, check with a long straightedge and adjust with the trussrod (dont overdo that)
Clean the sides of each fret while still in the neck, removing old glue, dust, organic material etc.
With special plier to remove frets take out the frets one by one, carefully lift each fret on one side until there is some leeway, then normally the rest is easy.
Now clean the empty fret slots in the neck with one of the special saws. Do not enlarge the slots, just take out old glue, dust and the like.
Clean away the rubbish.

For fairly standard Fender Strat neck Dunlop 6105 2^4 x 1^3
Jescar is better qualityBend the wire slightly more than the radius of the neck! So the radius of the bent fret as part of a circle is smaller than the radius of the neck.
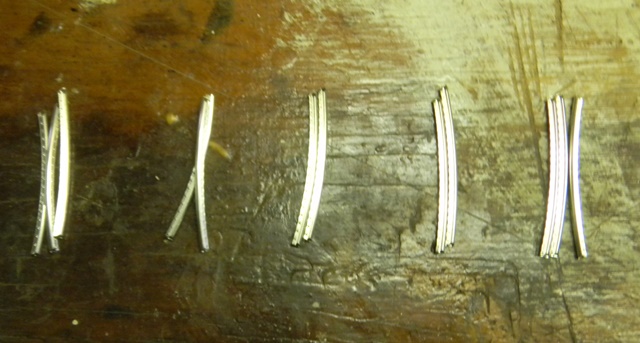
Cut a fret for each slot and keep the frets in sequence (thats crucial!). A good way to keep them is on piece of adhesive tape.
The more accurately this is done, the less work you have when finishing the neck. Hold the fretwire in the right position on top of the fretboard and cut at the edge of the neck.
As an aside, this step for bound necks is slightly different. It needs to be much more accurate, you dont want to damage the binding and have to repair it!!
For each fret do:
Place in vice upside down. With a two mm file remove about 2mm off the tang at the edge on both sides.
You will now have a flat portion with a triangular point (that is the remaining shape caused by the cutting plier).
File that little point until straight, maintaining a 60 degree angle....
There are other possibly faster and easier methods of course but this is how I learned from a pro.
Take an old wound string, top end, hold it on the wound length.
Drip a few drops of glue (consruction type which dries up hard not gooey) on a piece of scrap paper.
Scrape a bit of glue on the unwound part of the string, and move it into the first slot. Wriggle to and fro to ensure that glue is in the slot evenly. Ensure that no glue is left on the top of the fretboard.
If that happens by accident immediately remove the glue with a kitchencloth.
Prepare some 5 slots with glue. This is the number of frets you can handle in the next two steps without the glue hardening too much. If you’re less confident do three.Carefully maintaining the sequence of the prepared frets now take one and place it straight in the slot. If all is well the radius of the fret is slightly smaller than the fretboard.
Using a small hammer to lightly move the fret to be right in the middle of the fretboard.
Now softly using a small hammer drive the fret into the slot at the edges and a bit in the middle. Don’t drive the fret hard in the middle as that will cause it to straighten a bit, resulting in edges that refuse to remain in the slot nicely.
Some luthiers will use the hammer to set the frets all the way, but pressing as described below causes less damage and distortion.
Using a piece of wood and a clamp or a fretpress (In a vertical drilling stand, or use more expensive tools if you can afford them) press the fret well into the slot With rocking motions make certain that the edges are firmly pressed into the slot.
Make certain to support the neck under the fret you are pressing!!
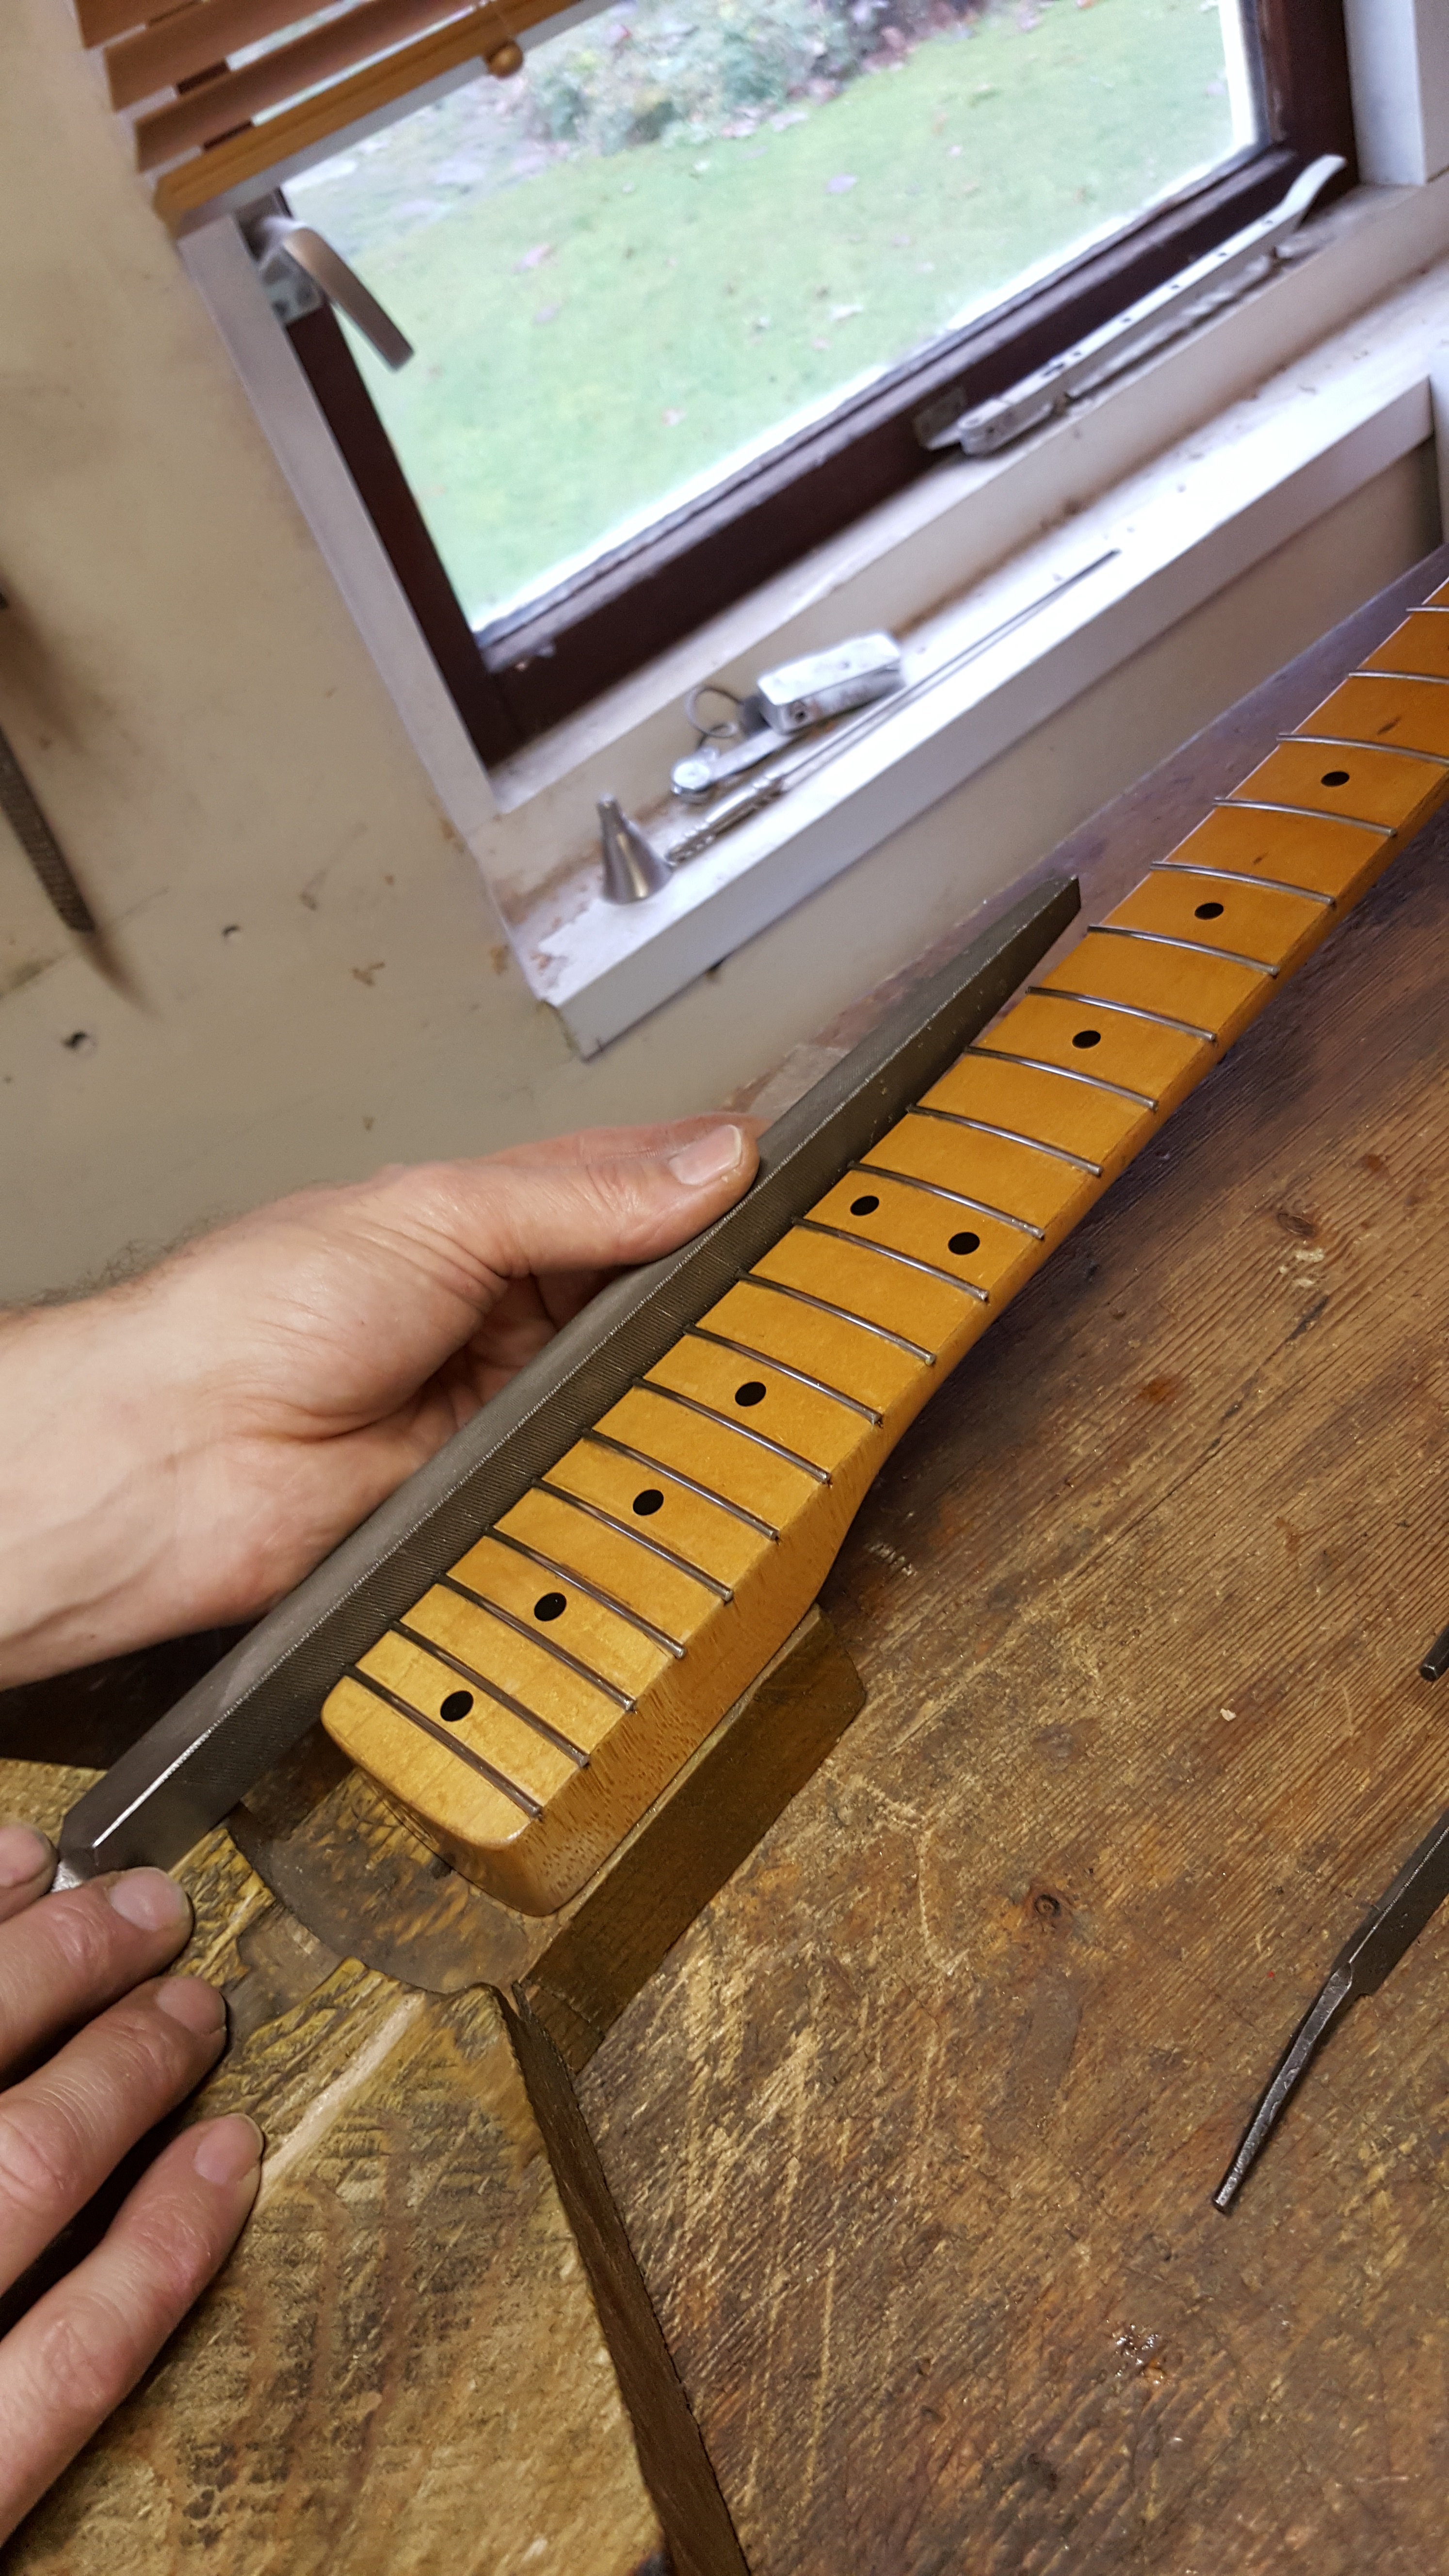
Some (if not all) frets will stick out from the edge of the neck, in other words moving your finger alongside the neck will leave little pieces of skin – not what we want.
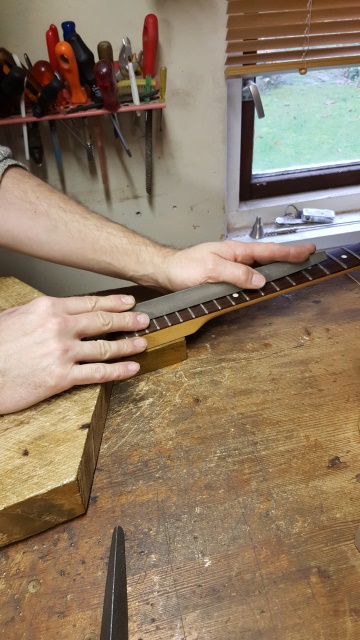
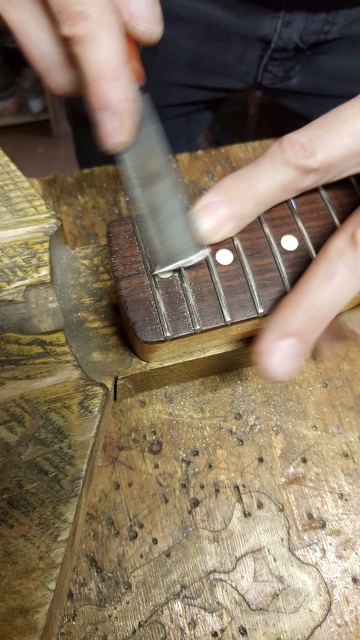
Use the 3-sided file (preferably a sweet or worn side) as shown in the pic and very carefully file down the nasty bits, avoid hitting the paint.
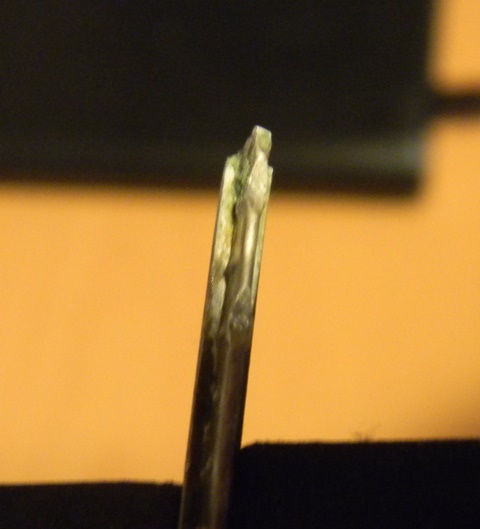
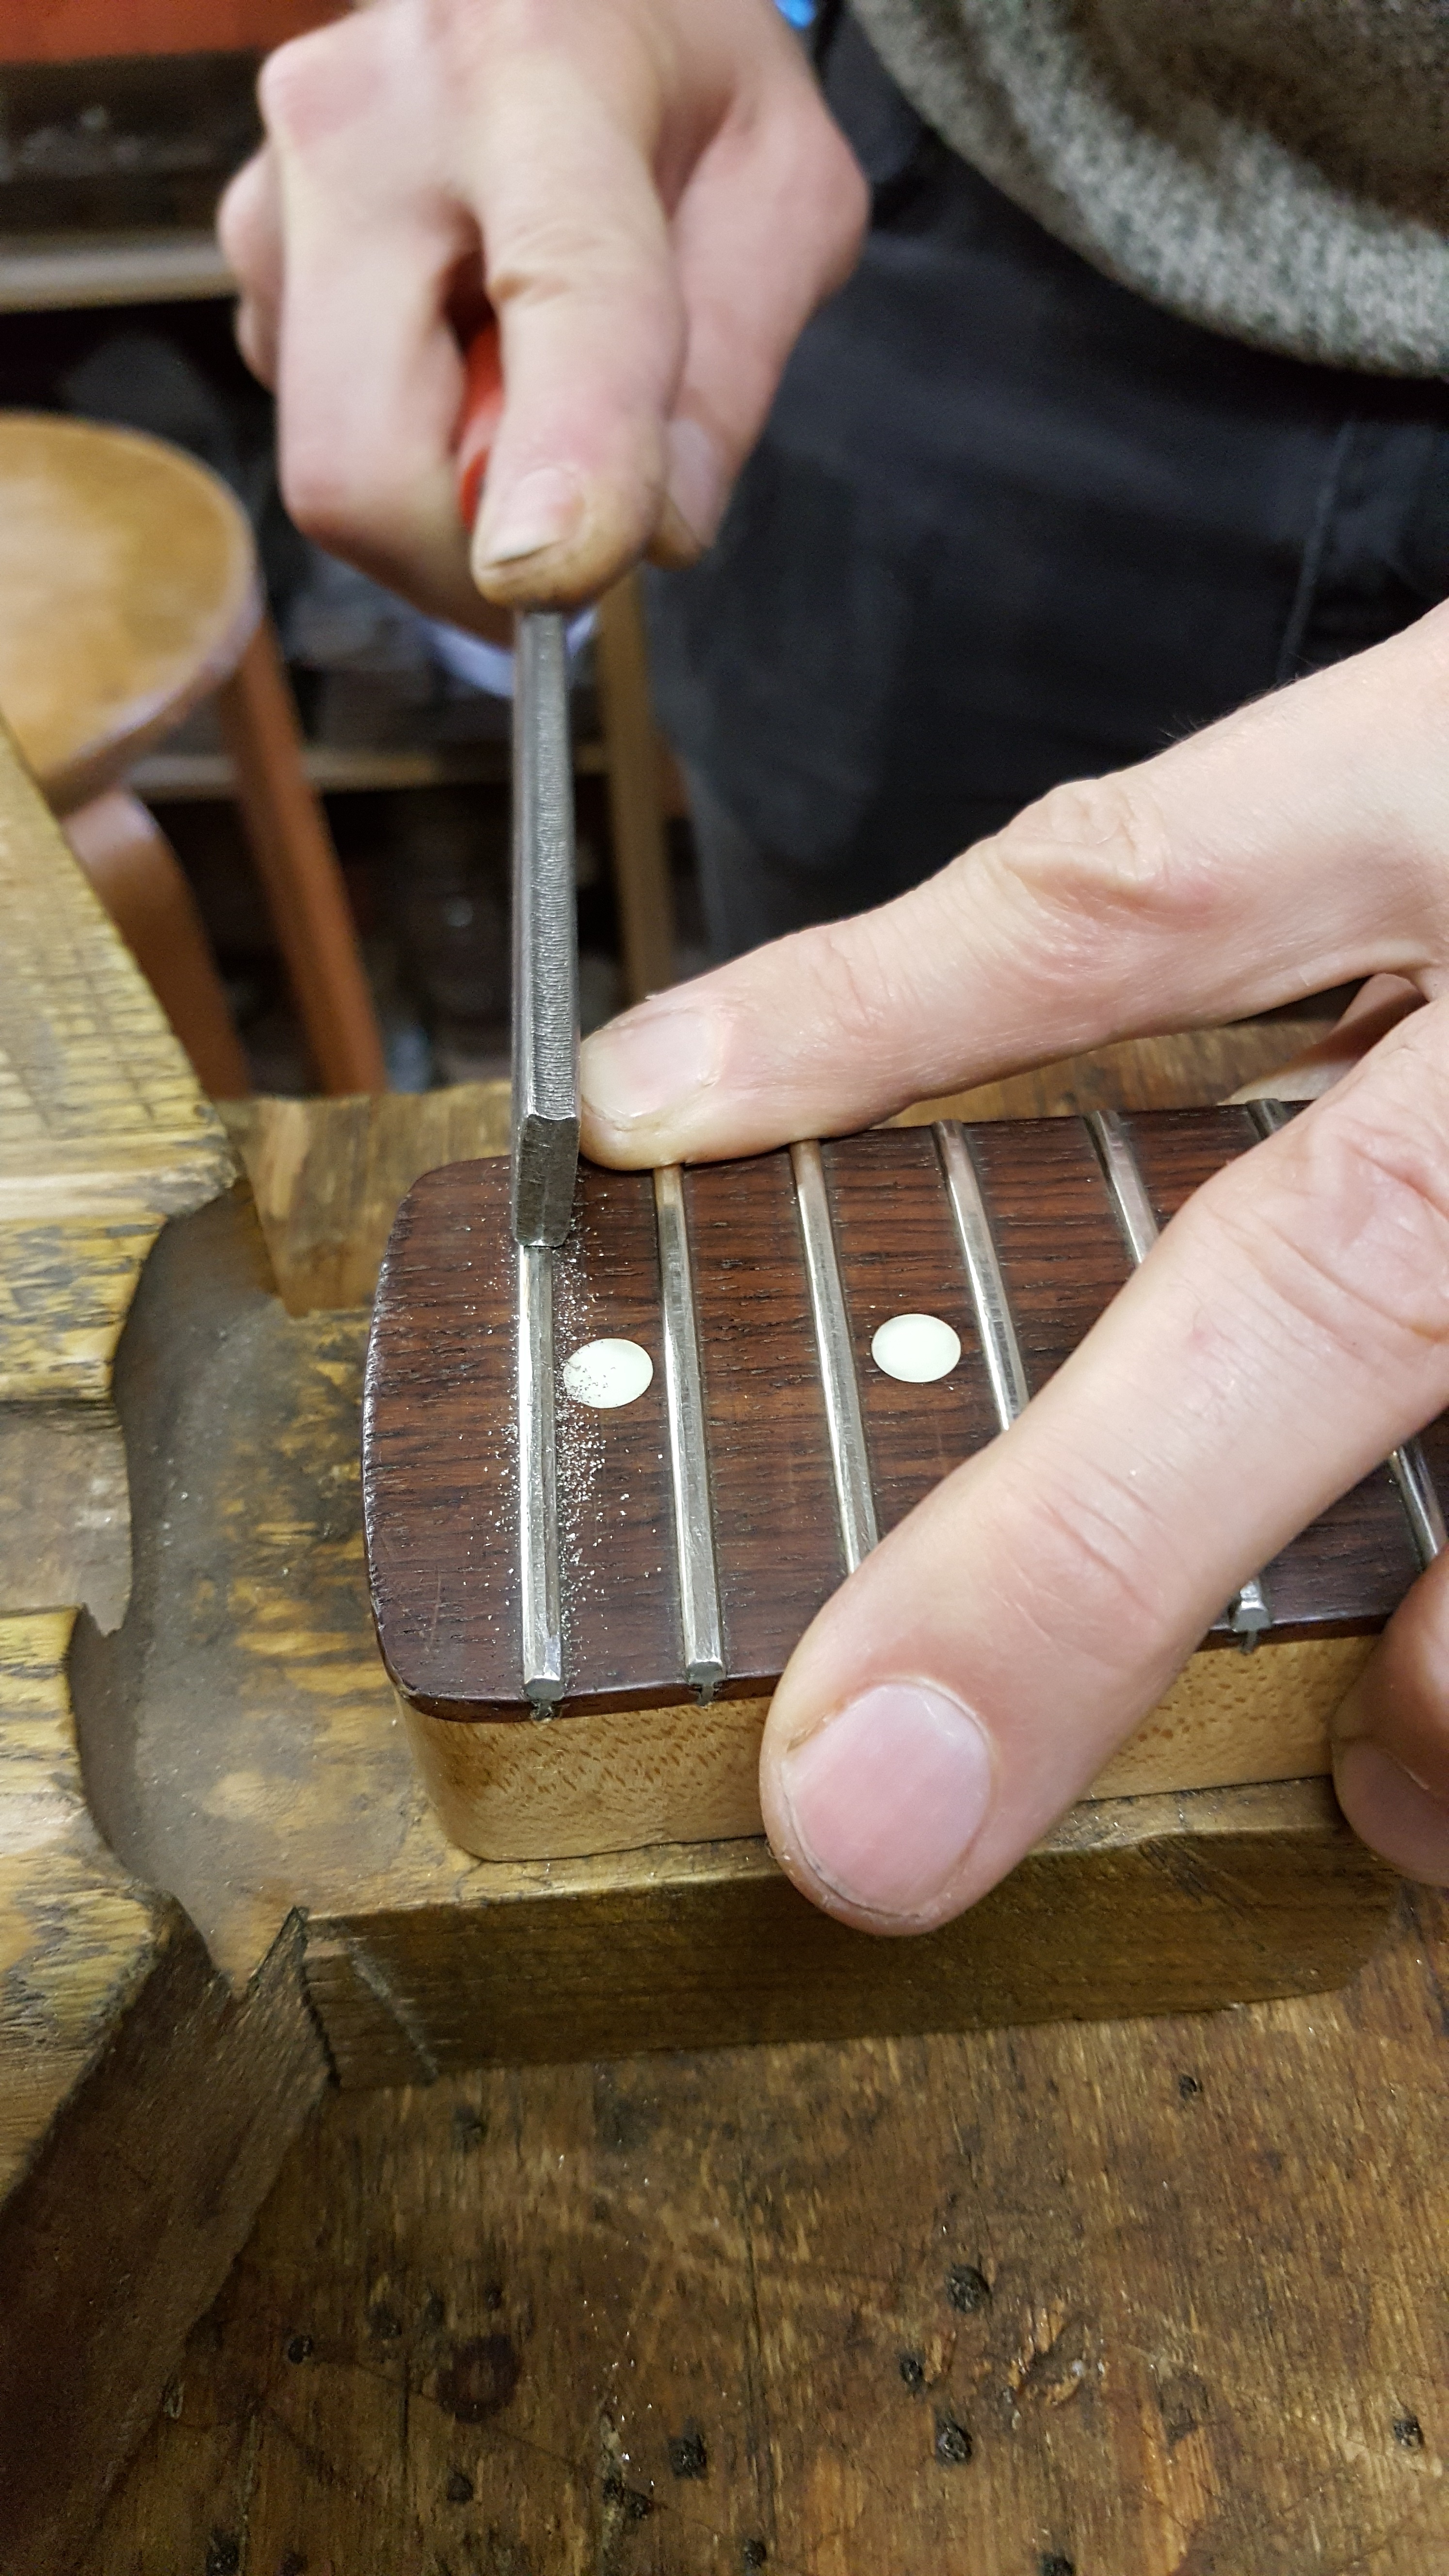
Once you’re happy with the edges (for example if you move your finger along the side it will not leave bloodied skin tissue), you will see that in some slots the tang is too short leaving a small hole.
Fill these with tiny drops of superglue. Little bits at a time, and repeat until it looks ok. This takes some time as you have to wait for the glue to harden.
This will not only nicely fill the hole, but also creep further into the fretslot and help fixing the fretends in place.
When completely dry remove the excess glue (some is unavoidable) with a flat file
This set of steps can be executed separately in order to reshape existing frets if some are worn, but in general enough material is present. This would be called a ‘fretdress’
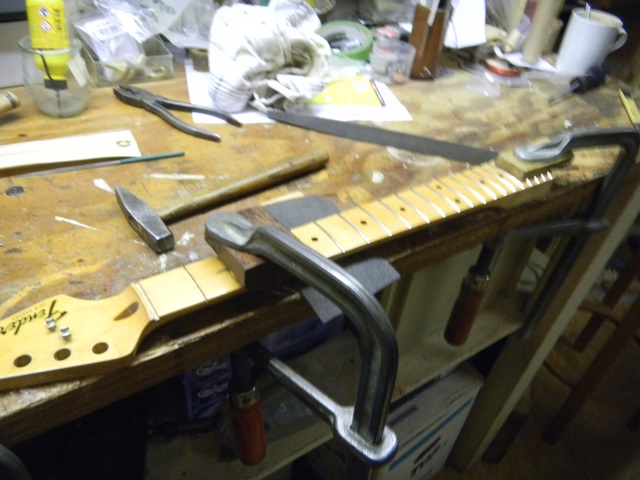
Using a three sided file (25 to 30 cms long) without wooden handle, file with long moves in parallel with the axis of the neck. Frequently (the more the better) check if all frets are hit completely. If a fret is not completely visibly hit continue leveling.
When all frets are visibly touched by the file repeat the filing but now perpendicular to the axis of the neck paying attention to the edges by following the radius
After the previous exercise all frets are even, however the tops of the frets are somewhar flat. This would cause an uncertain touch with the strings. We want the fret as round as possible whilst still being completely level.
YOu need the special crowning file for this.
Holding the file at a small angle treat first the left and then the right side until you see a thin (untouched) line just on the top of the fret. Good lighting here is essential. Don’t touch the top of the frets , only the round sides.
Use a fretboard protecting material, plastic or metal so you can polish the frets but not the wood.
Polish with a very very fine material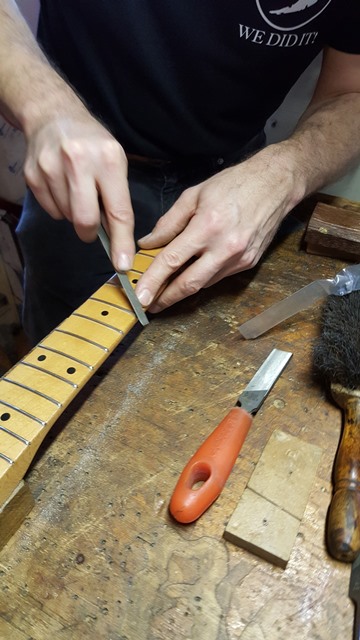
With a special edge file (has smooth sides so you don’t hurt the paint of the wood) round of the edges of the frets so the feel and look nice
Now clean away debris, lightly oil the fretboard anddone!
BACK TO TOP OF PAGE
Lets get in touch?
or use the link below - dont forget to fill in your own email address if you want me to respond: